Debug mode is enabled when we need more logs to analyze any issue. In this article we shall enable debug for a Job.
Debugging via GUI
Enabling Debug
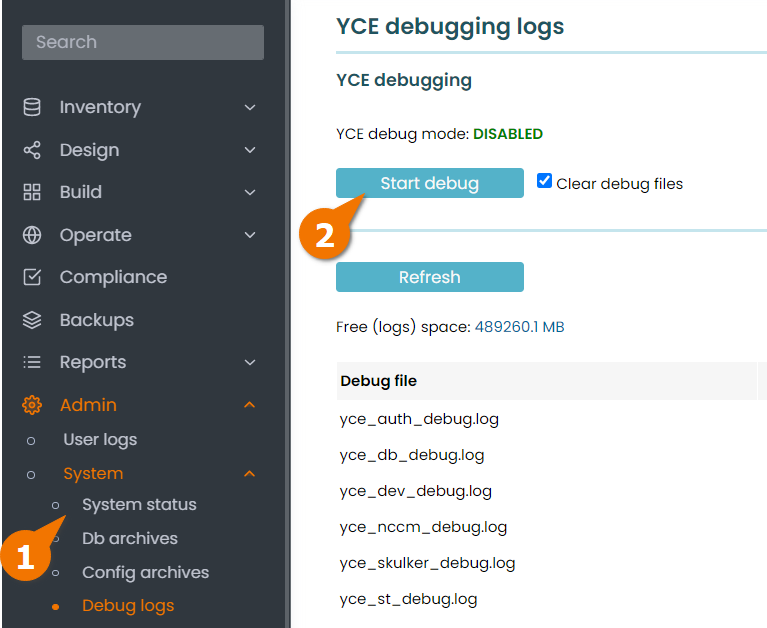
(1) Admin -> System -> Debug Logs -> (2) Start debug -> (3) OK

Create a Job
Create a Job (Recommended to perform in a duplicate/another browser tab) for which the debug logs to be viewed. 

Viewing Debug logs
Goto (1) Admin -> System -> Debug Logs -> Refer to the file with <job_id>_debug.log (In this case 0524_0003_debug.log)
Below are different ways to view debug logs
View -> Opens a pop-up window and displays the full file,
Follow -> Opens a pop-up file and displays as and when the new lines are created

Disabling debug
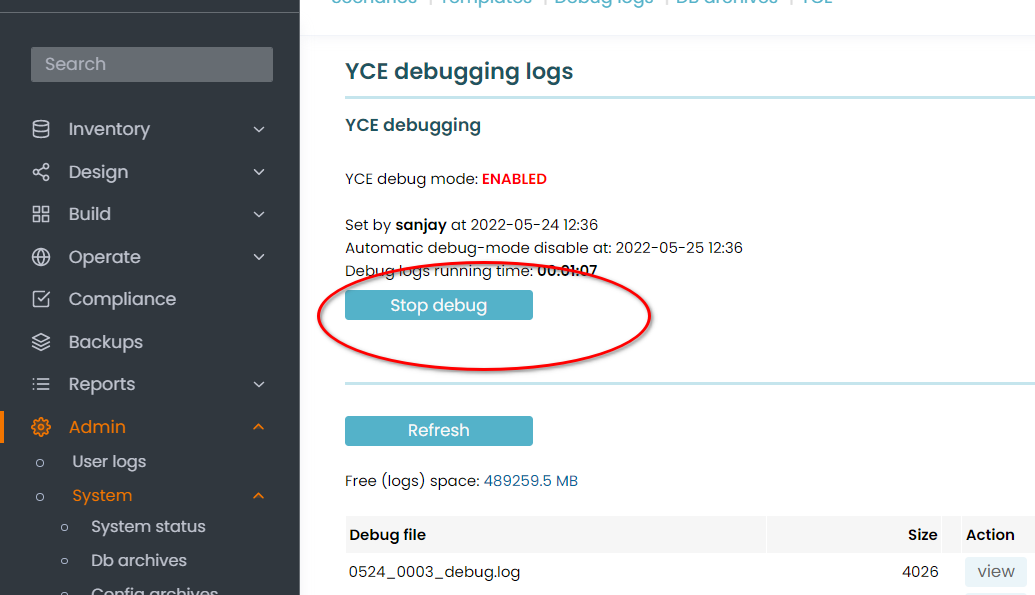
When the Job is completed we can can disable debugging by clicking Stop Debug (Admin -> System -> Debug Logs -> Stop Debug)

Creating Support File
Often we have to share debug logs to the support team for further investigation. This can be done by clicking Create Support File at the bottom of the page as below. This generates an encrypted file that can be shared.
(1) Admin -> System -> Debug Logs -> (2) Scroll to the bottom of the page to access "Create Support File" -> (3) download

Debugging via CLI
Enabling debug
Debugging can be enabled with the command "go set dev" in the CLI

Viewing debug logs
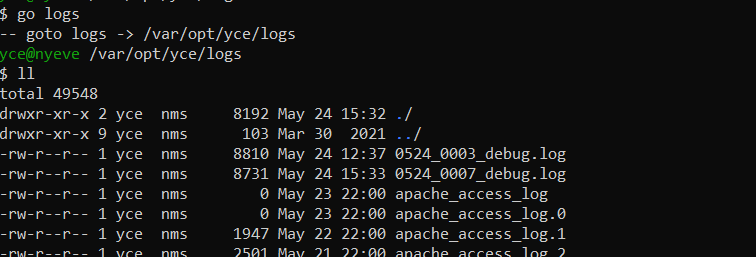
To access the debug logs, "go logs" and refer to the <job_id>_debug.log file

Disabling debug
Debugging can be disabled with "go clr dev" from the CLI

Creating support file
If debug logs needs to be sent to support team for further investigation, we need to create a support file. The mk_debug_set.pl script is the cli version of the support file creating function.

An encrypted file is generated in the /var/opt/yce/logs directory as below, which can be sent to the support team.
Was this article helpful?
That’s Great!
Thank you for your feedback
Sorry! We couldn't be helpful
Thank you for your feedback
Feedback sent
We appreciate your effort and will try to fix the article